I am here to abolish the false and misguided notion that knitting is exclusively a wintertime activity. This is a horribly erroneous belief that has been propagated through the ages, and likely stems from the idea that knitwear can’t be worn in the summer. This could not be more untrue! Summertime is excellent for knitted lace and sleeveless tops, and there are tons of lightweight fibre options that are amazingly breathable. Plant fibres like cotton, flax, bamboo, and hemp are ideal for summer knits, and nothing beats a nice linen blend on a sweltry summer’s day (take that, Old Testament!)
Here’s my guide to summer knitting so you can happily knit and purl your way through the solstice.
Tulip Tank Top

Pattern: Tulip Tank Top from Purl SoHo
Yarn: Cotton/linen fingering
I knew I had to make this tank as soon as I saw it. Look how weird it is! The way it’s constructed is even weirder. Check out the back:

The whole thing is knitted in one piece using short rows (the cast-on row follows bottom edge of the garment from shoulder to shoulder). The cotton/linen yarn I used is super light and breezy and has awesome drape. I do recommend going up a size, though, and using a stretchy cast-off, which I did not do.
Cap Sleeve Lattice Top
Pattern: Cap Sleeve Lattice Top from Purl SoHo
Yarn: Galileo yarn from Knit Picks in lunar and white

Another favourite from Purl SoHo. This top is made from a merino/bamboo blend and has a three-stitch-repeat lattice pattern on the yolk that offers significant ventilation. I made this a little different than the pattern suggests: I knit it in the round instead of making separate front and back sections and seaming them up the sides, which was a way easier approach. Who wants to knit/purl when you can just knit? Who? (A particularly purl-heavy project gave me tendonitis around Christmas 2013 and I’ve been slightly purl-adverse ever since).

Pretty!
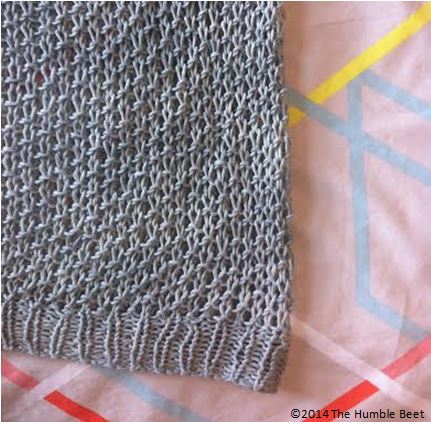
Amithiste Shawl

Pattern: Amethiste pattern
Yarn: Lindy Chain yarn from Knit Picks in harbor
My Amethiste shawl! I made one of these for my mother last Christmas in merino wool, but I like this cotton/linen version so much more (sorry momma). My favourite part is its scalloped edge, which is super hard to achieve with silky yarns, even with rigorous blocking. Cotton and linen are more drapey and less stiff and take to blocking extremely well.

Much like knitting, scarves and scarf-like apparel are totally ideal year-round. Summer nights be chilly!
Knitted Sleepwear

Yarn: Cascade 220
Knitted booty shorts, people! I spied these in More Modern Top-Down Knitting by Kristina McGowan, which my library conveniently has a copy of. I hadn’t even considered making below-the-belt knitwear until I met this book, and now my wardrobe includes both these booty shorts and a knitted pencil skirt. Heck yeah.
I hope these projects have inspired you to knit your way though the summer heat!